Error in Measurement
Any measurement made with a measuring device is approximate.
If you measure the same object two different times, the two measurements may not be exactly the same. The difference between two measurements is called a variation in the measurements.
 Another word for this variation – or uncertainty in measurement – is “error.” This “error” is not the same as a “mistake.” It does not mean that you got the wrong answer. The error in measurement is a mathematical way to show the uncertainty in the measurement. It is the difference between the result of the measurement and the true value of what you were measuring.
The precision of a measuring instrument is determined by the smallest unit to which it can measure. The precision is said to be the same as the smallest fractional or decimal division on the scale of the measuring instrument.
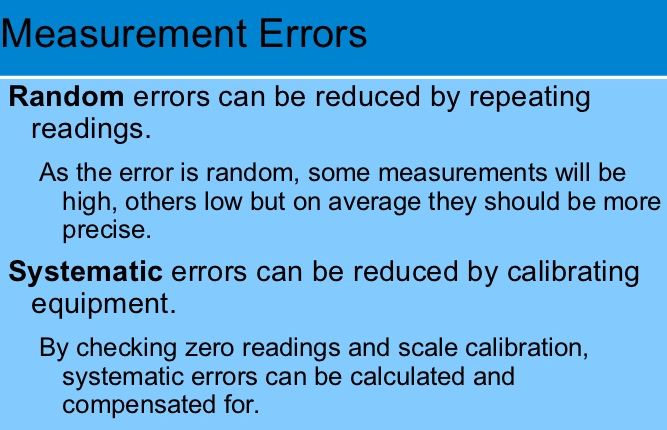
Ways of Expressing Error in Measurement:
1. Greatest Possible Error:
Because no measurement is exact, measurements are always made to the “nearest something”, whether it is stated or not. The greatest possible error when measuring is considered to be one half of that measuring unit. For example, you measure a length to be 3.4 cm. Since the measurement was made to the nearest tenth, the greatest possible error will be half of one tenth, or 0.05.
2. Tolerance intervals:
Error in measurement may be represented by a tolerance interval (margin of error). Machines used in manufacturing often set tolerance intervals, or ranges in which product measurements will be tolerated or accepted before they are considered flawed.
To determine the tolerance interval in a measurement, add and subtract one-half of the precision of the measuring instrument to the measurement.
For example, if a measurement made with a metric ruler is 5.6 cm and the ruler has a precision of 0.1 cm, then the tolerance interval in this measurement is 5.6 ± 0.05 cm, or from 5.55 cm to 5.65 cm. Any measurements within this range are “tolerated” or perceived as correct.
- Accuracy is a measure of how close the result of the measurement comes to the “true”, “actual”, or “accepted” value. (How close is your answer to the accepted value?)
- Tolerance is the greatest range of variation that can be allowed. (How much error in the answer is occurring or is acceptable?)
3. Absolute Error and Relative Error:
Error in measurement may be represented by the actual amount of error, or by a ratio comparing the error to the size of the measurement.
The absolute error of the measurement shows how large the error actually is, while the relative error of the measurement shows how large the error is in relation to the correct value.
Absolute errors do not always give an indication of how important the error may be. If you are measuring a football field and the absolute error is 1 cm, the error is virtually irrelevant. But, if you are measuring a small machine part (< 3cm), an absolute error of 1 cm is very significant. While both situations show an absolute error of 1 cm., the relevance of the error is very different. For this reason, it is more useful to express error as a relative error. We will be working with relative error.
- Absolute Error:
Absolute error is simply the amount of physical error in a measurement.

For example, if you know a length is 3.535 m ± 0.004 m, then 0.004 m is an absolute error.
Absolute error is positive.
In plain English: The absolute error is the difference between the measured value and the actual value. (The absolute error will have the same unit label as the measured quantity.) - Relative Error:
Relative error is the ratio of the absolute error of the measurement to the accepted measurement. The relative error expresses the “relative size of the error” of the measurement in relation to the measurement itself.
When the accepted or true measurement is known, the relative error is found using

which is considered to be a measure of accuracy.
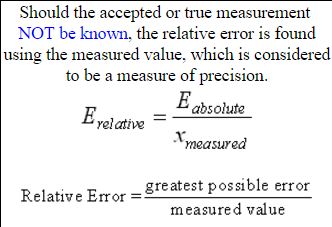
In plain English:

4. Percent of Error:
Error in measurement may also be expressed as a percent of error. The percent of error is found by multiplying the relative error by 100%.

Ways to Improve Accuracy in Measurement
- Make the measurement with an instrument that has the highest level of precision. The smaller the unit, or fraction of a unit, on the measuring device, the more precisely the device can measure. The precision of a measuring instrument is determined by the smallest unit to which it can measure.
- Know your tools! Apply correct techniques when using the measuring instrument and reading the value measured. Avoid the error called “parallax” — always take readings by looking straight down (or ahead) at the measuring device. Looking at the measuring device from a left or right angle will give an incorrect value.
- Repeat the same measure several times to get a good average value.
- Measure under controlled conditions. If the object you are measuring could change size depending upon climatic conditions (swell or shrink), be sure to measure it under the same conditions each time. This may apply to your measuring instruments as well.
Examples:
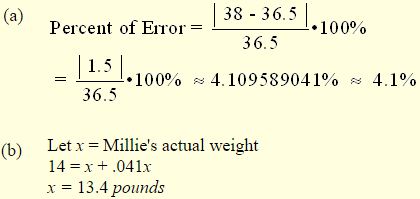
1. Skeeter, the dog, weighs exactly 36.5 pounds. When weighed on a defective scale, he weighed 38 pounds. (a) What is the percent of error in measurement of the defective scale to the nearest tenth? (b) If Millie, the cat, weighs 14 pounds on the same defective scale, what is Millie’s actual weight to the nearest tenth of a pound
Answer:
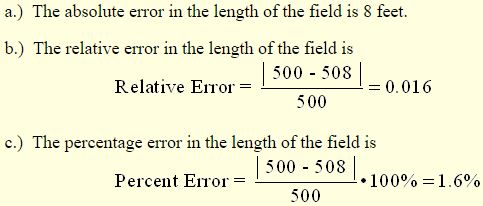
2. The actual length of this field is 500 feet. A measuring instrument shows the length to be 508 feet.
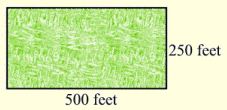
Find:
(a) the absolute error in the measured length of the field.
(b) the relative error in the measured length of the field.
(c) the percentage error in the measured length of the field
Answer:
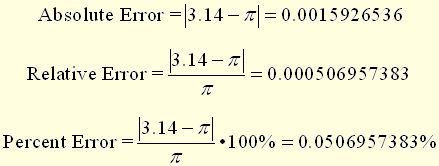
3. Find the absolute error, relative error and percent of error of the approximation 3.14 to the value , using the TI-83+/84+ entry of pi as the actual value.
Answer:
